Principle of hardness control according to Leeb's method
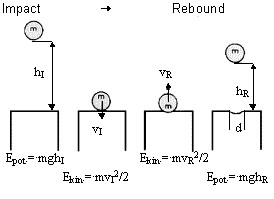
d = diameter of the impression
Epot = potential energy
Ekin = kinetic energy
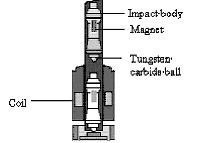
Hardness is indirectly measured through the energy loss of an impact body. The figure illustrates the physical principle of measurement. A mass m is accelerated to the surface of the test object and hits it at a defined speed (measured before impact), ie. kinetic energy. The impact creates a plastic deformation of the surface, i.e. a footprint, deformation that absorbs some of the energy - or velocity - of the impact body. The softer the material, the larger the footprint, and the greater the energy absorbed - and the decreased speed - is important. Technically, this principle of measurement is implemented by means of a tungsten carbide spherical impact body which is projected onto the test surface by means of a spring.
The speeds before and after impact are measured without contact. This is done by a small permanent magnet in the impact body that produces an induction voltage during its passage in a coil, this voltage being proportional to the speed.

The Swiss inventor of this method, D. Leeb, has defined his own hardness value, Leeb hardness value. The hardness value of Leeb, HL, is calculated from the ratio of impact velocity and rebound according: HL = VR/VI×1000
VI, VR = Speed before / after the impact.
However, few users indicate the Leeb HL hardness value in its characteristics or test reports. For this reason, the rebound hardness method becomes interesting if we can convert it to normalized hardness (HV, HB, HS, HRC, HRB, N / mm2). For this reason, conversion tables for the most common materials are stored in all instruments.
In order to obtain reproducible and precise results, it is necessary:
- to have a clean surface with a correct roughness.
- to have sufficient rigidity of the impact zone: if the part deforms elastically during the impact, part of the kinetic energy will be used for this elastic deformation and restored during the rebound instead of being used for plastic deformation => measurement error. For this reason, we ask for a weight and a minimum thickness of the part which are functions of the type of impact body used (see table of probes).
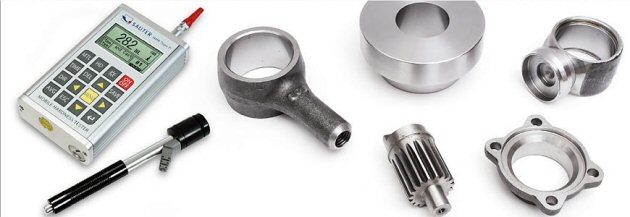
All LEEB hardness meters incorporate LEEB hardness conversion tables to other scales depending on the material. These tables are indicative.
Example of a conversion range for a HLD probe
Materials
|
HV
|
HB
|
HRC
|
HRB
|
HSD
|
Steel
|
81~955
|
81~654
|
20~68,4
|
38,4~99,5
|
32,5~99,5
|
Alloy tool steel
|
80~898
|
-
|
20,4~67,1
|
-
|
-
|
Stainless steel
|
85~802
|
85~655
|
19,6~62,4
|
46,5~101,7
|
-
|
Grey cast iron
|
-
|
63~336
|
-
|
-
|
-
|
Ductile iron
|
-
|
140~387
|
-
|
-
|
-
|
Cast aluminium
|
-
|
19~164
|
-
|
23,8~84,6
|
-
|
Brass
|
-
|
40~173
|
-
|
13,5~95,3
|
-
|
Bronze
|
-
|
60~290
|
-
|
-
|
-
|
Copper
|
-
|
45~315
|
-
|
-
|
-
|
The first LEEB hardness testers were developed and manufactured by Proceq under the name Equotip. Other manufacturers now offer similar hardness testers.
LEEB durometers meet various standards
German standards and specifications
- DIN 50156-1 “Metallic materials – Leeb hardness test - Part 1: Test Method”
- DIN 50156-2 "Metallic materials - Leeb hardness test - Part 2: Verification and calibration of the testing devices"
- DIN 50156-3 "Metallic materials - Leeb hardness test - Part 3: Calibration of reference blocks"
- DGZfP Guideline “Mobile Härteprüfung“
- VDI/VDE Guideline 2616 Part 1 “Hardness testing of metallic materials”
American standards:
- ASTM A956 “Standard Test Method for Leeb Hardness Testing of Steel Products”
- ASTM E140 - 12be1 "Standard Hardness Conversion Tables for Metals Relationship Among Brinell Hardness, Vickers Hardness, Rockwell Hardness, Superficial Hardness, Knoop Hardness, Scleroscope Hardness, and Leeb Hardness"
International standards
- ISO/DIS 16859-1 "Metallic materials - Leeb hardness test - Part 1: Test method"
- ISO/DIS 16859-2 "Metallic materials - Leeb hardness test - Part 2: Verification and calibration of the testing devices"
- ISO/DIS 16859-3 "Metallic materials - Leeb hardness test - Part 3: Calibration of reference test blocks"


 français
 Nederlands


