content="14/09/2022″/> Metrology

Lightweight comparators

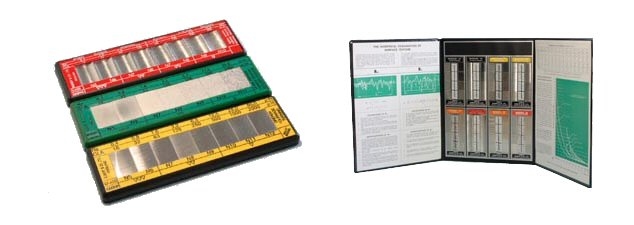
Comparators for visual roughness comparison/reference Microsurf
This range of light-weight comparators is more suited to office and design shop use to give to the designers a visual reference for surface states in various conditions of machining. Each block includes patches finished or machined following the procedure indicated on the surrounding label. The value of roughness data in Ra complies with ISO 2632 and BS 2634.
Those comparators should be only used for a visual comparison and are not intended to serve as a reference surface to calibrate the roughness gauges.

Summary table

Item Number
Machining Method
Number of Patches
Ranges of roughness values
Ra (µm)
Rz (µm)
N-groups
315
Surface grinding
8
0.025 to 3.2
0.25 to 16
1 to 8
316
Cylindrical grinding
8
0.025 to 3.2
0.25 to 16
1 to 8
317
Flat lapping
criss-cross
4
0.025 to 0.2
0.4 to 1.0
1 to 4
parallel
4
0.025 to 0.2
0.4 to 1.6
1 to 4
318
Cylindrical lapping
+ superfinishing
4
0.025 to 0.2
0.4 to 1.0
1 to 4
4
0.025 to 0.2
0.4 to 1.6
1 to 4
319
Face turning
8
0.4 to 50.0
1.6 to 160
5 to 12
320
Cylindrical turning
8
0.4 to 50.0
1.6 to 160
5 to 12
321
End milling
8
0.4 to 50.0
1.6 to 160
5 to 12
322
Reaming
+ drilling
4
0.4 to 3.2
1.6 to 16
5 to 8
4
1.6 to 12.5
6.3 to 63.0
7 to 10
323
Horizontal milling
8
0.4 to 50.0
1.6 to 160
5 to 12
325
Shaping (planing)
8
0.8 to 100.0
4.0 to 400.0
6 to 13
326
Linishing (belt sanding)
6
0.1 to 3.2
1.0 to 25.0
3 to 8
328
Vertical grinding
6
0.2 to 6.4
1.0 to 40.0
4 to 9
329
Grit blasting
+ shot blasting
4
3.2 to 25.0
25 to 160
1-4 comme dans
ISO 8503/1
4
3.2 to 18.0
25 to 100
331
Spark erosion (EDM)
8
0.4 to 50.0
2.5 to 160
5 to 12
333
Hand filing
5
0.4 to 6.4
2.5 to 63
5 to 9
334
Castings
7
0.8 to 50.0
2.5 to 250
6 to 12
335
Honing
6
0.05 to 1.6
0.25 to 10.0
2 to 7
336
Polishing
5
0.0125 to 0.2
0.25 to 1.6
0 to 4


Get the best deals for your location; Select your country